HYPERSPIN OLD ARCADE cabinet PRojects
ARCADE PROJECT
MAME arcade project.
Take a old arcade cabinet, add one PC, add two monitors, add one arcade joystick.
MAME arcade project.
Take a old arcade cabinet, add one PC, add two monitors, add one arcade joystick.
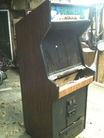
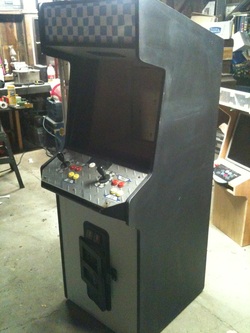
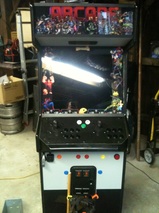
I picked a old 1987 Gruella War arcade shell. 100 dollars.

Step 1:
Windex, paper towels, clean my friend and keep cleaning. We are talking over 20 years of warehouse and arcade dust. This sucker went through an entire roll of paper towels.
Windex, paper towels, clean my friend and keep cleaning. We are talking over 20 years of warehouse and arcade dust. This sucker went through an entire roll of paper towels.
Step 2:
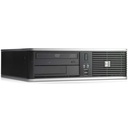
Once cleaned, we move onto adding the equipement. I installed a OLD HP DC7900 (I added two hdd which will be mirrored once I get the OS up and running) I upgraded the video card (Cheap basic ATI 40 dollar card) You don't need to high end to run MAME and other emulators.
Once cleaned, we move onto adding the equipement. I installed a OLD HP DC7900 (I added two hdd which will be mirrored once I get the OS up and running) I upgraded the video card (Cheap basic ATI 40 dollar card) You don't need to high end to run MAME and other emulators.
Step 3:
Add in two monitors, we used the second one as live Marquee. I mounted the second monitor using a cheap flush monitor mount ($15)
I dropped the main monitor into where the old CRT used to sit. I had to cut to fit it properly.
Step 4:
Install the XARCADE joystick, I used L brackets from home depot to mount it permanently to the cabinet. Just on a side note the back of the joystick has a program button if you want to reprogram what the buttons inputs are as keyboard presses. I ended up drilling a hole and moving it to the front of the joystick to make it accessible. Good thing to do before mounting it.
Step 5:
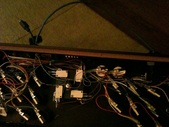
I figured the coin box coin slots are basically a switch that activates when a quarter passes them. I used CAT5e network cable and wired both coin boxes to the joystick two white buttons (they will be mapped as COIN1 and COIN2) Now you can drop quarters in to get credits.
I figured the coin box coin slots are basically a switch that activates when a quarter passes them. I used CAT5e network cable and wired both coin boxes to the joystick two white buttons (they will be mapped as COIN1 and COIN2) Now you can drop quarters in to get credits.
Step 6:
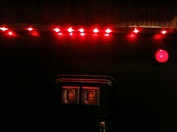
I added some lighting to the arcade to make it look good in the dark. The shelf below the joystick I drilled holes (1/8 bit) I then purchased LED XMAS lights from the dollar store. I wired them to a USB cable (Draws 5 volts) and power them with the PC.
Step 7:
On the right side you see a large red circle, I picked up a power button from SAYAL electronics for 5 dollars. I wired this to the power button on the PC to allow turning off and on of the computer. It uses a 12v light which I wired into the 12 power on the power supply of the computer.
PROJECT 1: GUREILLA WAR CABINET
Project 2: AREA 51 CABINET
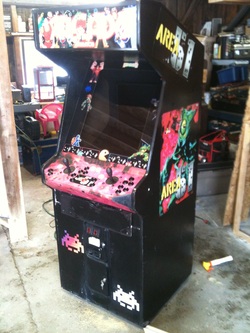
Picked up Area 51 cabinet. Not too bad of shape.
Clean it up, lots of Windex.
Insert Computer, two monitors, add X-Arcade Joystick.
Final Touches are adding the decals and a bit of paint.
Using the existing Joystick interface - I gutted the X-Arcade and moved the buttons over to the frame. The holes were already predrilled and fit nicely.
Project Completed:
Project 3: KIDCADE (OLD WHITE BOARD DOORS)
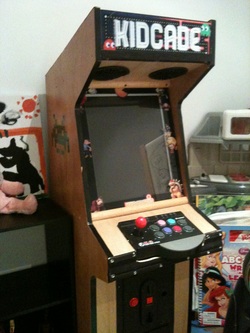
Goal here was to build a miniature KID-Arcade.
I took Vinyl Shelves purchased from XS-Cargo. I cut them to a rough shape similar to the A5 frame of my original arcade.
Below picture give you perspective on how big it is. My Daughter is 6 years old. Its roughly 4FT tall.
I added the black trim around the edge. I bought a standard USB joystick and inserted into the arcade.
I mounted speakers and monitor (which had to be rotated)
I added a non working coin box (circuits removed inside) for ascetics
This project was fun and straight forward to build. The key was using lots of L brackets for bracing inside the unit.
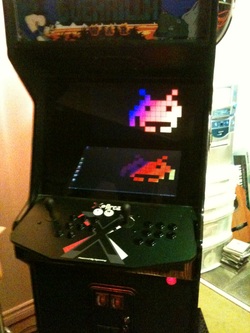
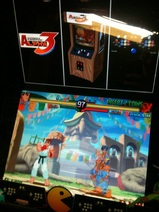
Project 4: STREET FIGHTER CABINET
Onto the next one:
This is nice A2 cabinet that was in overall good shape.
Same steps involved as the others, clean out interior, remove existing joystick (wont be able to use this as it limited on buttons holes) We will need to add the X-Arcade joystick.
The Marquee: Remote existing Vinyl from the marquee (if you can some get bonded really well)
In those cases you will have to replace the plexiglass.
Cleaning: Wipe down everything with windex etc make sure its clean. Vacuum inside and top (lots of dust etc)
Remove everything that's not needed.
NOTE: Get some black spray paint and spray the inside in the monitor area (makes it darker when monitors are added)
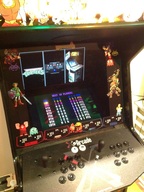
Final Steps: STREET FIGHTER CABINET
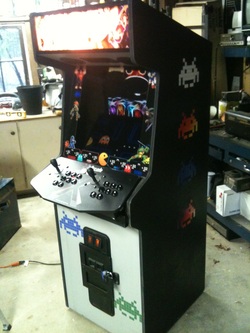
Added the X-Arcade Joystick: Using L Brackets mount it to the cabinet. I had to build a platform for it to rest on.
Decals: Decal the Marquee, Plexi-Glass over monitor cover (This will have to be tinted, make the monitors appear to float) The picture is before tinting - you can see the wood sides (I didn't spray paint this -learned after I built it next project ill know better)
Testing: Map out all the X-Arcade to the proper keyboard keys. Test and double test.
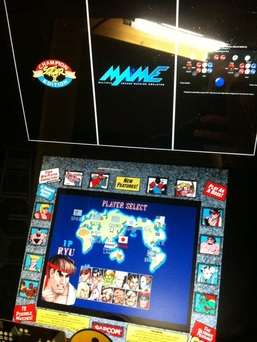
Same idea with this one, got two monitors working
Main One: 23" is the actual gameplay
Second: 22" is for live marquee (shows control and game info)
Decals: Decal the Marquee, Plexi-Glass over monitor cover (This will have to be tinted, make the monitors appear to float) The picture is before tinting - you can see the wood sides (I didn't spray paint this -learned after I built it next project ill know better)
Testing: Map out all the X-Arcade to the proper keyboard keys. Test and double test.
Same idea with this one, got two monitors working
Main One: 23" is the actual gameplay
Second: 22" is for live marquee (shows control and game info)
|
|
Project 5: NEO-GEO
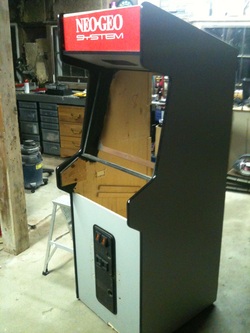
Another for some fun:
OLD 1992 SNK system. Same idea here to add some arcade life to this.
Requirements:
1 PC (HDD, VIDEO CARD) 2 MONITORS (Larger 22-23" and smaller 19& up)
1 X-Arcade Joystick, 1 Can Spray Pain (Black), Computer Speakers (with volume control if you can find)
1 Switching Power bar (Power Master Control - turns off other devices when its not in use
1 Light (Basic light with bulb - will be mounted to interior of marquee cabinet)
10ft of network cable to extend buttons etc.
2x2 boards to create frams to mount monitors
2xFlush monitor mounts
2" Wood Screws (for monitor mounts etc)
1 low wattage light bulb (low heat - CFL etc type)
I had to add black Mirror-Plexi to the bottom (Minor damage) Looks good.
|
|
PROJECT 6: FIX IT FELIX JR
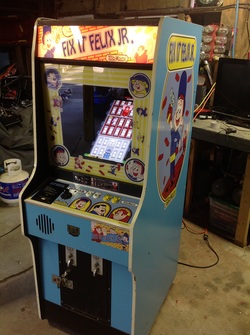
FIX IT FELIX JR CABINET:
I picked up a old Nintendo Hogan's Alley Cabinet (For those who are serious arcade fans) there was nothing inside it.
I found the decals online someone had offered up along with the game.
Disney user a HP PC to run the game - I copied this to make it match exactly how Disney had setup there's
Step1: Remove old decals off the side (Were damaged so didn't feel to bad removing them)
Step2: As always clean with Windex and lots of it.
Step3: Replaced the control board with laminated wood board, add original controls to the board (keep it authentic)
Step4: Apply decals and graphics to (Marquee, Sides, Plexi glass etc)
Step5: Install PC, Monitor. Setup Game and lock the PC down.
Step6: Black out monitor edges using black matt cardboard to give the monitor floating look.
Overall Happy with how this turned out, works quite well, check out my you tube link.
http://youtu.be/xOQROlUGYLk
Project 7: PACMAN COCKTAIL CABINET1980 Classic Pacman Cocktail Cabinet.
This was a interesting project and likely the longest on going project to date. I have had this for 8 months now. Finally after three tries got the button layout the way I like. I used blue LED buttons for button 1 and 4. I drilled holes in the bottom of the cabinet and glued in blue LED XMAS lights to give a blue light effect on the bottom. I just recently applied the space invader decals and plan to cover the top with a black boarder with four space invaders decals in each corner. I will make them either white or blue or maybe have a blue shadow effect behind them. ____________________________________________________________________________________________________________________________________________ PROJECT STILL NOT DONE and I ended up keeping this one cause I liked it. |
Project 8: SWINGING BELLS CABINET (1978)
|
I picked this cabinet not sure if this was a good idea or not? Its smaller and made with 3/4 inch oak veneer. Overall solid cabinet and I thought with a little stain it would look great. I brought it home to begin its transformation.
|
PROJECT 9: GRAVITAR (1982)
This replaced the first arcade I brought to my basement. The artwork, the stainless steel joystick, I couldn't resist. I still need to replace the MARQUEE and BEZEL with artwork to complete this but that's half the fun.
PROJECT 10: UNKNOWN
Unfortunatly this was a clean grey cabinnet (HS2) Built and sold.
PROJECT 11: 1998 GOLDEN TEE
Fun project, first time I have tackled using a trackball. Ended up keeping the 3" original one it in. Ordered this Opti-WIZ For 20 bucks it converted it to a mouse. Worked great.
project 12: 1990 neo geo hs5 retrofit
I did this one as a gift to the brother in law as a house warming gift (Cabinet only) he bought the parts etc. I just installed them.
|
|
|
project 13: first "thin cabinet"
I was finding that the full size cabinets nice as they are - are a pain. Their extremely heavy. First time you get them the removal of the old parts takes time. And finally finding them was getting harder and harder. I took my HS2 Gravitar cabinet and copied the blueprint but took away the depth as NEW LCD monitors don't need the same space. Sorry for lack of pictures I didnt think to take many.

project 14: second "thin cabinet" white plexi
Lots of fun, after my first thin cabinet went well. I built this, I have several sheets of white plexi so might as well use it rather then buying more (Expensive) Dark stained walnut, high gloss, chrome edgeing, 24" LED monitor.
project 15: thin cabinet three - workcabinet
My side project before XMas. I bult a cabinet for work, try to make more fun at work. Yes I work for a computer company hence the name on the marquee. Kick plate was fun to add. I used white melmine and spray painted it (Don't do it) the paint doesnt stick white melmine at all. I ended up adding gloss to hold paint and decals. I just couldn't find black melmine at the time and wanted to save work instead of staining wood.
project 16: 1986 Un squadron retrofit
Found this locally rotting in a shed. It was a mess, lots of water damage. Monitor didn't work, rust on everything. This was going to be gutted for parts only. I wanted the coinbox and glass for other projects. I ended up using the left over parts to make this little cabinet. Its not the prettiest but I was able to save it from being scrapped. The original design was ugly with loads of aluminmum framing.
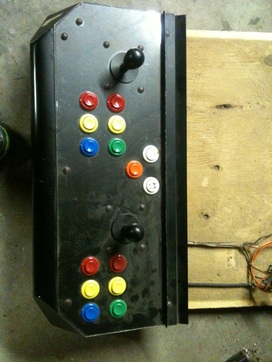
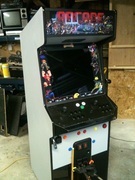
project 17: 4 player monster cabinet
Using my 2 player design, I simply expanded to include 4 contorls. I also wanted a large screen. This ended up being my best to date. This was sets the bar on any new projects going forward.
